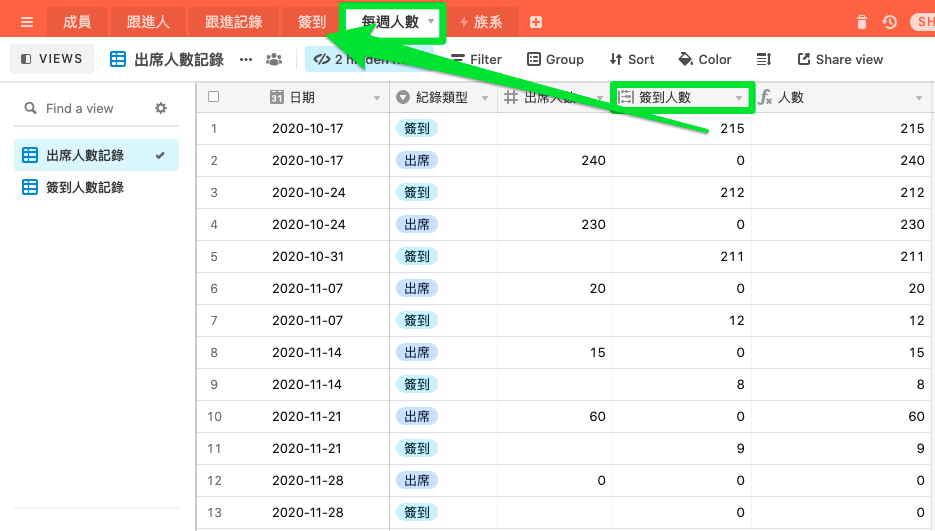
簽到統計
這個Automation是這樣做的
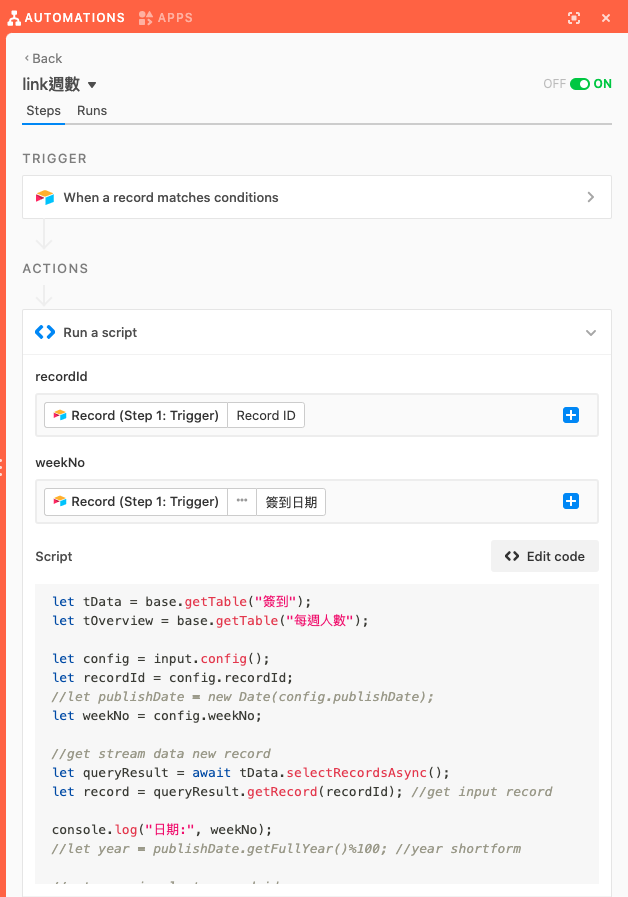
let tData = base.getTable("簽到");//取得簽到Table
let tOverview = base.getTable("每週人數");//取得每週人數Table
let config = input.config();
let recordId = config.recordId;
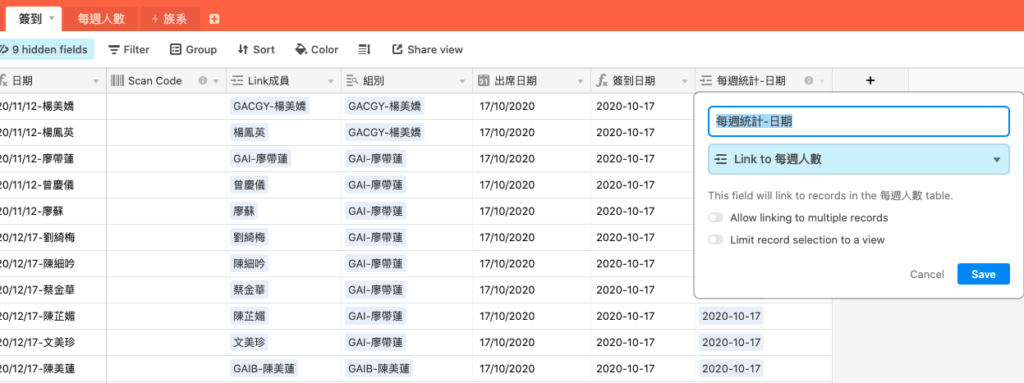
let weekNo = config.weekNo;//取得weekNo 我這邊是簽到表裡面的「簽到日期」
//get stream data new record
let queryResult = await tData.selectRecordsAsync();
let record = queryResult.getRecord(recordId); //用recordID取得「簽到」表裡這一筆資料ID
//get overview last record id
let overviewQuery = await tOverview.selectRecordsAsync();//取得「每週人數」裡面的紀錄
let overviewMatchRecord = overviewQuery.records.filter((r,index)=>{
return r.getCellValue("日期") == weekNo //尋找「每週人數」裡面「日期」等於==「簽到」表裡面的「簽到日期」weekNo的紀錄
})[0];
//update WeekNum to overview record id if exist 找到的話,將「簽到」裡面「每週統計-日期」這個欄位設定值為對應的日期
if(overviewMatchRecord){
console.log("matched and update");
await tData.updateRecordAsync(record,{
每週統計-日期: [{id:overviewMatchRecord.id}]
});
}else{
console.log("unmatched and create");
//create new and update record
let newId = await tOverview.createRecordAsync({"日期": weekNo});
await tData.updateRecordAsync(record,{
每週統計-日期: [{id: newId}] //如果這個日期不存在於「每週人數」的日期中,就會自動創建一筆這個日期的紀錄
});
}
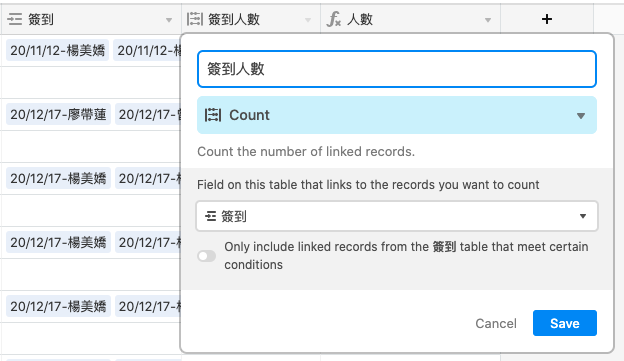
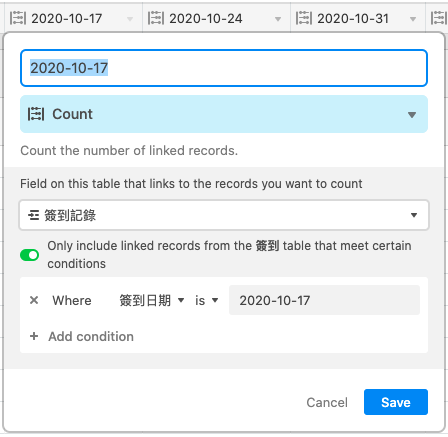
這是用條件是count的欄位來做的